Monday, December 6, 2010

Collaborative Print Project- WINE LABELS

Assembling the bottles


For the final project, we were instructed that the class would be broken up in to groups of three or four people, and each group would develop a cencent for a collaborative class project. Each project proposal had to aim to showcase each designers work in set or series. While various media could be used to develop the imagery or text, all design pieces had to be digital in the final format and converted into a process color image. To narrow down which project the class would all rally behind and produce, we had a critique day where we went thru each proposal and voted on the final project that would go in to action. My group made a proposal to each design a wine label for a set of government approved wine brand names that were in need of labels before they could be bottled and shipped out across the nation. My family friend, Paul Kalemkiarian, is a wine entrepreneur that owns the "Wine of the Month Club" based in Monrovia, California. He owns the rights to six "brand names" for wines, kind of like the equivalent to owning a web domain or something, before the actual site has been created. The exciting part about this project is that each student, depending on the strength and accuracy of their design in following labeling regulations and policies, would automatically carry the potential to be picked up and used for bottling and shipped out across the country!- granted that Mr. K would want to use it. Although our class had several strong ideas that would have been successful in satisfying the project requirements, our class was very ambitious in that they went ahead and selected my group's project.
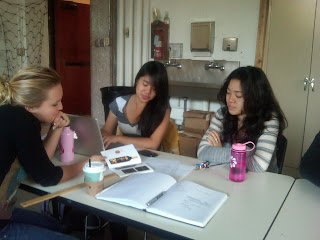
Production 2: Final revision of the booklet
Immediately the class was divided up into groups- the art directors that would over see the concept and determine the final outcome of the project, Production #1 that would focus on quality control of the labels and printing of the labels to be placed on the bottles for photography, the Marketing Team that organized the photography of the mocked up bottles as well as preparing the final "Design Tasting" presentation party at the end of the project, Production #2 that would be responsible for creating the template for a booklet to compile everyone's labels into one catalogue and having it printing thru an outside company, and the Traffic Team that aided in setting up the GoogleDocs and kept everyone on track with the timeline for the project and budget of $1000 donated by Roski. On top of that, everyone's individual responsibility was to design a label to "showcase" their design aesthetic. Everyone worked incredibly diligently to ensure the completion and success of this project. It was a really great experience to able to lead a group of my peers in a design project- something I have obviously never done before but enjoyed the responsibility of it very much.

Here is a link to the Googledocs that will further reveal the process and updates that the class received throughout the course of the project: https://docs.google.com/leaf?id=0B5_qqmqZDVC8NWMwYzc3NGItNTQzNy00OWNiLThkMmItYWJhM2E2YWU5YjVk&hl=en&invite=CLqg4fsC

Here is the brief I wrote for the introduction of the booklet/ catalogue:
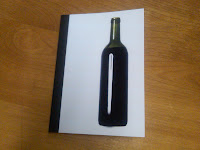
The Booklet!!
This is a catalogue of the collaborative work of the FA 302 Design students at the USC Roski School of Fine Arts.
It all started out when we obtained permission to work with six government-approved wine “brand names”. They held potential to exist as bottled wines in the world, but were nothing more than names- they lacked an image, they lacked labels. This is where we stepped in as designers. Our challenge was to each interpret one of the wine names however we saw fit, keeping in mind our target audience as well as government labeling regulations. We all addressed the same fundamental “problems” by utilizing our personal strengths as designers. Therefore, through wine labels, our individual aesthetics are showcased in a uniform format, allowing us to present the range of possibilities for something that deserves the unique consideration of a designer. Now these brand names and blank bottles have been given the visual design elements they once lacked, fulfilling their potential to be produced, bottled, and enjoyed. 

Removing the labels in the bathtub :)
My personal process, aside from keeping the class posted regularly on the status of our project, included meetings with Mr. Kalemkiarian (who also donated the bottles we mocked up with our labels!), researching government labeling regulations and laws, creating diagrams for the class to follow, researching local printing companies, and keeping tabs on the rest of the groups to make sure everything flowed as smoothly as possible. Lots and lots of emailing occurred :) 
I began by going to a market to observe the wine aisle and get my hands on some bottles to see what I liked and didn't like, what popped off the shelf, what spoke sophistication, etc., etc. I found this step to be really helpful in getting fresh ideas and see the range of possibilities in bending the rules/laws of label design in order to incorporate all of the required elements without sacrificing artistic design. 
dancing man doodle
Next I started tie-dying sheets of paper towels with food coloring so that the dye patterns would look more authentic and natural than the perfect swirled images you could find on the internet. My first round of designing just seemed too obvious though, for the name "Tie Dye". I wanted to push it further. But first, I decided to move on and get fresh eyes by designing for "Dancing Man Vineyards" for a while. For this design, I hand drew some little dancing figures to get the looseness and flow that would come with a fun night of drinking wine and dancing. I scanned in the figures and hand-rendered text and continued the design on the computer by live-tracing and adding body copy, etc. I still wasn't really satisfied though. I decided to go back to Tie Dye, and start fresh. I didn't want tie dye to be the main visual element because it seemed so obvious. It was really kind of limiting. So instead, I began sourcing popular 1960's era posters, drawings, album art, typography, etc. I found this to be much more intriguing and went with it...


Sunday, December 5, 2010

Redefine Media

For this project we were asked to "Take an existing visual element from one media and translate it into another media. The objective is to explore new materials, investigate what happens to the translation of messages in a new media (including changing target audiences), and discuss how design elements can move from a 2D to 3D to viral, interactive, or performance based. Write a design brief for each iteration of the project describing the differences and similarities as well as changes in the message and audience." 

For this project, for some reason, I was drawn to the idea of recreating children's vinyl placemats. Below is my design brief, explaining my decisions:

            My plan is to design and produce a set of paper placemats called “Adult Matters” that mimic the vinyl children’s educational placemats that many of us grew up using. Why? Because now that we are grown up, what are we supposed to use?- “Adult Matters”- to educate us for the next stages of our lives. Instead of featuring common knowledge that children need to learn (like the fifty states and their capitals, world geography, the alphabet, the presidents of the United States, etc.) “Adult Matters” will feature information that all adults should know: how to impress your boss, how to survive on a first date, the arrangement of a formal table setting, dinner table etiquette, etc.
Hand-drawn cartoon images 
            Just as the mats take a more mature approach in content, they will also take a more mature approach in appearance. While recognizing and playing off of the bold simplicity and childlike aesthetic of the original kid’s mats, “Adult Matters” will be monochromatic in color scheme (instead of bright primary colors), and will be printed on brown recycled paper (instead of stark white like most kid’s menus at restaurants). This aesthetic will be more appealing to an older audience, but they will still feature hand-drawn and cartoon like images to satisfy the light-hearted and humorous content. Overall, the layout and format of the “Adult Matters” will be simple, clean, and straightforward so that the combined bluntness of the description and respective clip-art-like-doodle contribute to the humor of the “lesson”. Since they take an amusing and comical approach to life lessons, they aren’t necessarily meant to be taken seriously, yet they could be considered useful and practical at the same time.
Tube/Roll of Placemats
The design decisions behind the “Adult Matters” are all intended to help capture a target audience of young adults. These young adults are most likely, but are not limited to, people who grew up using the vinyl kid’s educational placemats and see the humor in the adult life-skills version. “Adult Matters” in their unique cardboard tube cases, could be bought at places like Urban Outfitters, art museum gift shops, amazon.com, or other places where novelty items such as this would be respected. The eco-friendly and earthy cardboard cases along with the brown recycled paper of the mats would also help capture the young-adult audience that tends to be very “go-green” conscious.
            “Adult Matters” are meant to be laughed at and shared with friends, not necessarily used in privacy or in seriousness. Yet, a possible secondary audience would be those who secretly need to learn these adult life-skills and have resorted to trying to learn social skills off of placemats while eating at home by themselves. “Adult Matters” would make great gifts for things like moving in to a new/first home or apartment, going off to college, graduating high school or college, birthdays, or just for fun!
            In conjunction with the AdultMatters placemats, I would like to release a set of cocktail napkins that carry out the same theme of humorous education in relation to every-day-life situations. The plain white cocktail napkins are designed to tell you how to act or what to say in certain situations (i.e. on a date, out at a bar or club, speed dating, parties, etc.). They contain two bubbles—a “thought-bubble” and a “speech-bubble”. Within the thought-bubble would be what is really going through your head while in the situation, and the speech-bubble gives a translation of what would be appropriate to actually say out loud during the situation. I made these by drawing out some clouds/bubbles and inserting the text in to them. Then i printed them reversed out on paper and used xylene to transfer them on to the plain white cocktail napkins. They would help market the AdultMatters products of light-hearted education for adults by having the AdultMatters brandname printed on them and making people more familiar with the other main products like the placemats. These cocktail napkins could be distributed to bars, clubs, restaurants, etc. that would attract the same kind of young target audience the AdultMatters brand is shooting for.

First Date Survival Guide Placemat
For this project, I had initially planned on using the format of thick and permanent vinyl placemats, but throughout my process, I grew further invested in the aesthetic appeal of the brown recycled paper. Not only would it capture a certain audience of young adults that tend to favor the "go-green" movement, but it visually coincided with the hand-rendered imagery and added a natural comfort that stark black-and-white imagery could not. Also, for the sake of printing capabilities, I had to sacrifice my idea to print the mats in a continuous and repeated roll with perforation between the mats for the sake of printing capabilities. However, if the project were to be mass produced in reality, this is how I envisioned the final version. 
Formal Table Setting Map Placemat
How to Impress your Boss Placemat


Thursday, December 2, 2010

Necessary Objects

This project asked us to take any "necessary object" and design a two-page spread featuring the object. When trying to decide which object to work with, my train of thought first lead me to thinking of everything in life that truly are necessary- food, water, air, etc. I knew I wasn't going to design based on this. So then I started thinking about how in advertising, even the most useless objects are depicted to seem necessary. Naturally, I resorted to SkyMall magazine- the mecca of seemingly necessary yet utterly useless objects. This is where I discovered the Marshmallow Shooter.
In designing a two-page spread for the Marshmallow Shooter, I immediately was drawn to the idea of following a comic-book kind of style-- i.e. benday dots, bright primary colors, word bubbles, action noises, gridded narrative/storyboard layout, etc. I looked to places like Roy Lichtenstein's work, comic book spreads online, and various design books for inspiration. (And got my hands on to an actual Marshmallow Shooter, of course!). 
I drew tons and tons of little thumbnail sketches for layout practice and seemed to narrow it down to a couple solid possibilities. Then, I got on a computer and began designing. I found a photo on the internet of a guy holding a Marshmallow Shooter angled a certain way towards the camera that I thought would be perfect. I live-traced it and began designing all based around this image. This was a mistake. I basically trapped myself in to basing my design around this certain photo that I thought was so perfect but in reality it was just forcing me to make bad aesthetic decisions. My body copy looked terrible too...I was having to basically plop it in as an afterthought and squeeze it in to empty areas versus really putting the thought in to incorporating it into the design. (It just took me a while to realize it).
Finally, after getting frustrated with feeling "stuck" and unhappy with the overall look of my layout, I decided it was time to start fresh. I didn't like how my design looked because by Adobe skills were not adequate enough to mimic traditional comic-strip aesthetic without looking pathetic and contrived. So it was time to resort back to what I do know, and that is: how to make things by hand. 
I went back to my original thumbnail sketches and started drawing from there. I hand-rendered by layouts using pens, markers, etc. and then scanned the images in and made adjustments on Illustrator. I further researched various comic book styles, straying a way from my original Liechtenstein idea a bit. I went to the bookstore on campus and went through a lot of different comic-book archive books and then went to a comic book store at Universal City Walk to get a better understanding of the culture I was trying to make look authentic. I found this to be pretty helpful. Even though elements like my body copy text and stuff still needed to be tightened up a bit, I think I learned a lot in this project, especially about how important it is to make things look authentic if you are referencing recognizable visual culture. When you are obviously trying to make something look like something recognizable and specific and you fall short, it looks awful. So I'm trying to avoid that and stick with what I know, but simultaneously I want to show some range in my abilities and to challenge myself as a designer. 

Redesigning Space

For this first assignment we were asked to "Explore an actual physical public site (a park, a strip-mall, a street corner, a school, etc.) Extract and redesign visual elements from that site, anything that might be used as a motif to identify (and perhaps transform) that site." And based on that, "Develop a poster or gate-fold brochure for that site, exploring letterforms utilizing photography, montage, and collage. Develop a texturally motivational work that will be narrative in format. Use existing imagery whether found or photographed to elicit viewer participation and appreciation of letterforms in their environment.
The process for developing this project started with the class going to Exposition Park and doing a practice exercise of really just experiencing a space. I found that I was drawn to small beautiful details in the space versus the broad expanse of the whole garden. I photographed and drew sketches of things like the patterning of tree roots, bark, blades of grass, flower buds, etc. Then when we began brainstorming about alternative uses for the space, I found myself to be kind of hung up on "practical" uses for the space-- things that were more realistic given several surrounding factors of the gardens: tradition in preserving the gardens, the student body versus the surrounding residents in the neighborhood, etc. Despite the fact that Haven repeatedly told us to think "blue skies", I wanted things to be at least somewhat realistic. 
Next we had to chose our own spaces to redesign. I was still thinking on a really practical level. I didnt want to just repurpose a space for another useless thing to take up, so I began brainstorming things/places that needed some remodeling or werent functioning up to their whole potential. Any student at USC will agree on the fact that the "University Village" is disgusting and really doesnt cater to the needs of students in any way. So that is how I chose my space; I wanted to redesign the University Village to fit the needs of the Trojan student body. 
collection of various characters on cloth
I brainstormed over and over and created several lists of types of stores and services that college students needed and wanted. I surveyed classmates, asked fellow Greek members, researched successful college campuses and the "best college towns" in america to help me with revisions and narrowing down the list. I had a combination of both entertainment facilities, convenience stores, retail, restaurants, etc., etc. I played around mapping out different layout plans, researching outdoor malls like the Grove to get an idea for the "look" and ambience i was going for. And, eventually, came to the whopping conclusion that the project I was tackling was far too realistic to be any fun. This project was something that USC  is most likely already in the research for actually doing in the near future. So I decided to narrow it down a bit, and get back to the joy I find in smaller details of a more expansive space. 
Costume Shop. The University Village most definitely needs a costume shop. It would be SO successful with the amount of themed parties the students of USC attend on a weekly basis. My next step was to figure out all the ins and outs of what my costume shop would be like, so that I could fully understand the sort of place I was designing/advertising for. I decided that instead of being like a regular costume shop that rents out set costumes that get all stinky and gross, I wanted it to be set up more like a normal clothing store where you would have the freedom to mix and match different elements to create your own outfit. The clothes on the racks though would be very eccentric and costume-esque, and the store would be arranged in separate rooms divided by era or theme. 
original tinfoil version
In figuring out how to advertise to my target audience of college students (specifically USC students), I liked the idea of creating small fliers that could be not only handed out on campus, but left in people's bike baskets and stuff too. To catch the average college student's eye though and gain their attention, I wanted my ads to be humorous and peculiar, while emphasizing the costume shop's main perk that shoppers would get to mix and match their own outfits together instead of getting stuck renting or buying a pre-arranged costume. Playing off of the mix-and-match idea, i began having classmates help me in completing a bunch of "exquisite corpse" drawings. My idea then developed even further in to the idea of collaging different outfit elements together out of magazine clippings and imagery. The characters I created had a lot of personality and were pretty funny and entertaining. I mounted them on layers of tinfoil and brown paper and white paper to  emphasize a DIY quality, but was unsatisfied with the turn out. The tinfoil was actually really hard on the eyes, detracted from the characters, and didnt seem to hold a real purpose. So, I reassessed some different options and came to the idea of pinning them on to different scraps of cloth. I thought this would be successful in that they definitely wouldnt be disregarded by students as your average piece-of-trash flier. They seems more thoughtful and unique and personalized. I also turned the collaged figures in to paper dolls and labeled them with the costume store "Suit Yourself" logo. That way, the headless paper dolls could be held up to cameras and people could pose "wearing" the funny little outfits. It would serve as a whole other form of automatic advertising for the shop because perhaps these photos would be uploaded on to facebook, the internet, etc. and the "Suit Yourself" name would be spread quickly. 
Painted versions 
Two versions of the final fliers


Over-all I was pretty pleased with how elements of "Suit Yourself" came together and how I was able to visually communicate the purpose and function of the store without blatantly spelling it out. I found the nature of the collage characters to be visually compelling enough that I even wanted to take them to the next level and paint them, resorting back to my fine arts basis.